Option 1: Set the time on the server level
Note: This is only applicable if you are the server administrator on your own installation.
When you have your own server, you can adjust the time settings at the server level.
This can be useful when all your connected screens are in the same time zone. Avoid using this function if the screens are not in the same time zone.
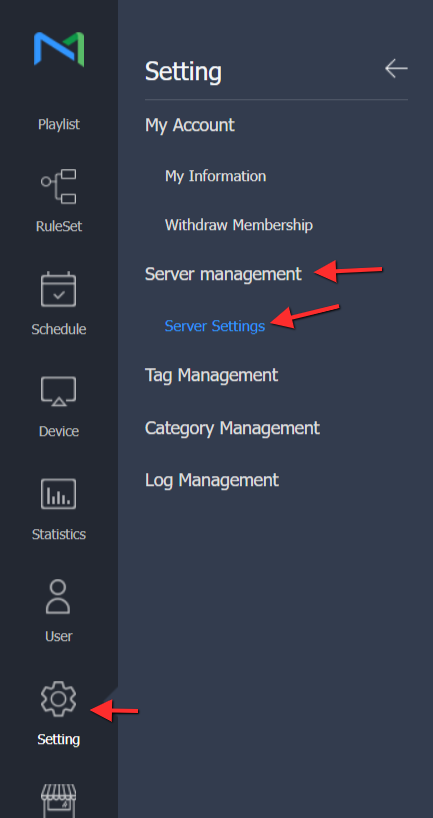
Step 1. Log in with the server administrator account on your MagicINFO server and go to:
Settings >> Server Management >> Server settings
Step 2. Scroll down to 'Automatic Timezone' (S-Player).
Here, you can choose the time settings you want to apply by default. All connected S-Players will use these settings. But if you use presets, they will replace these default settings.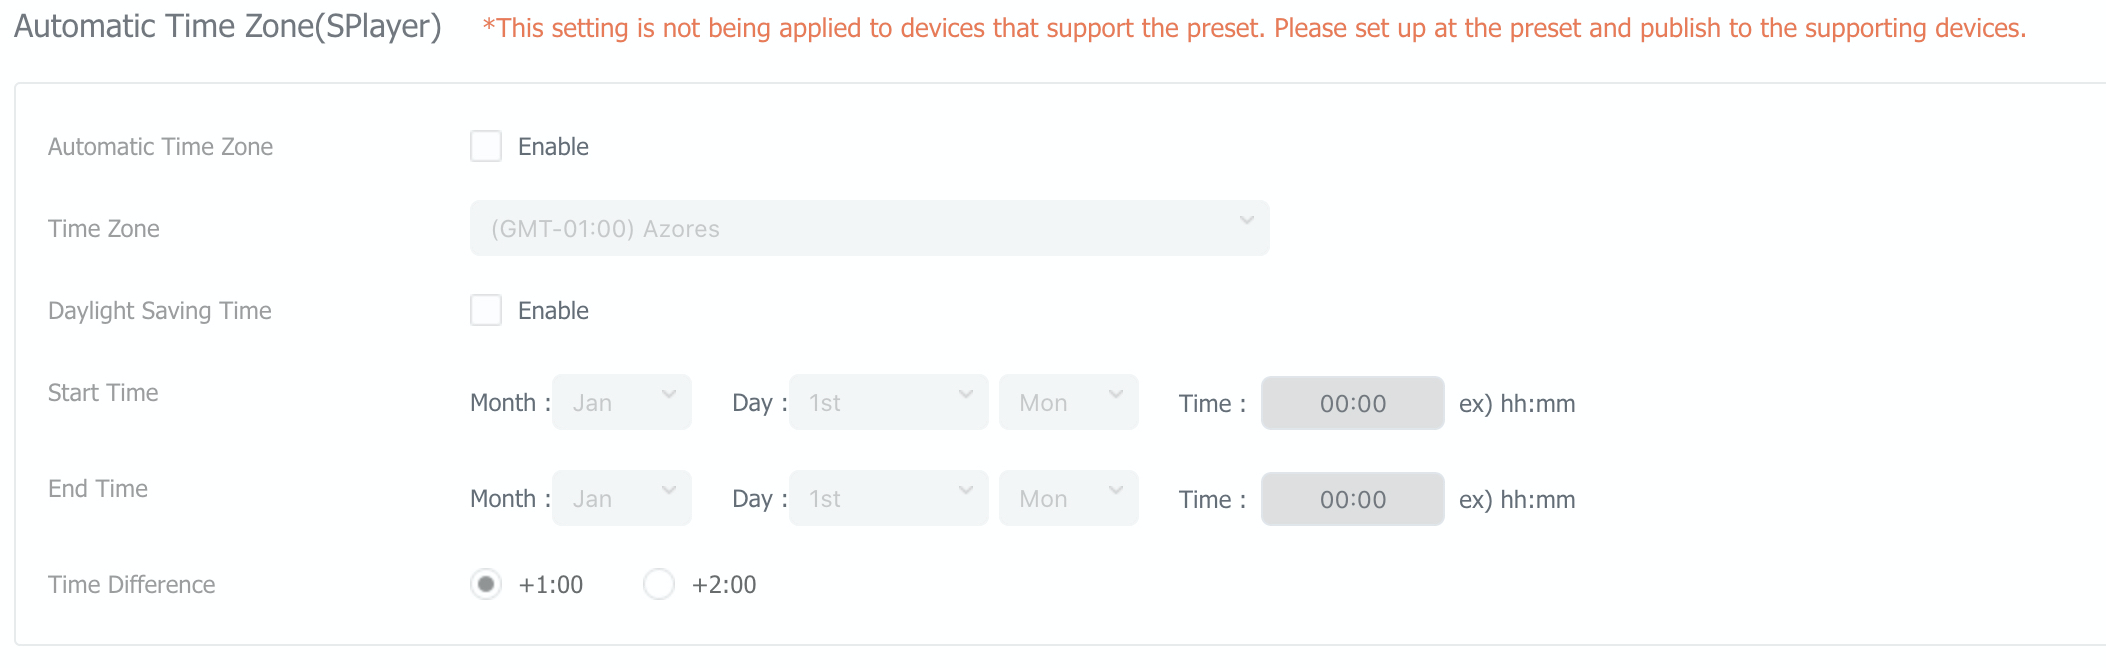
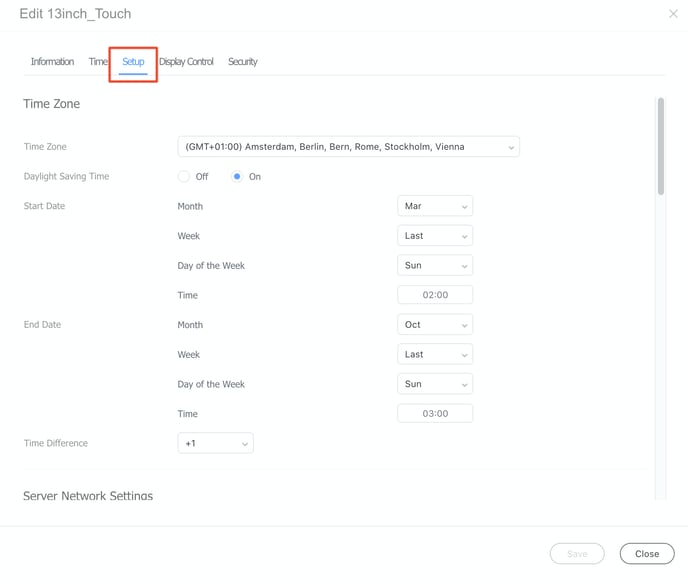
Option 2: Set the time on the device level
When you have devices connected with different time zones, you can set up a time setting for each connected screen.
Step 1. Go to the Device tab, open a device by clicking the "i" icon, and click Edit.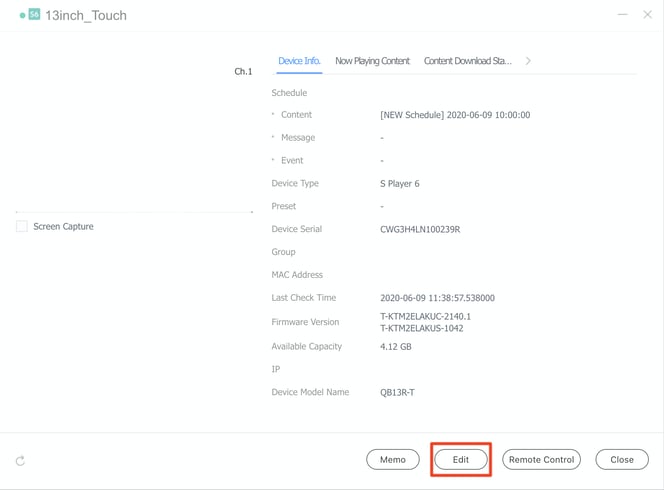
Step 2. Go to Setup.
You can double-check the current time of your connected device, go to the tab Time, and click on Current status.
Here you also see the messages (The current time cannot be set for the equipment now. You should set the timezone). This means you have not set the time setting as mentioned in OPTION 1.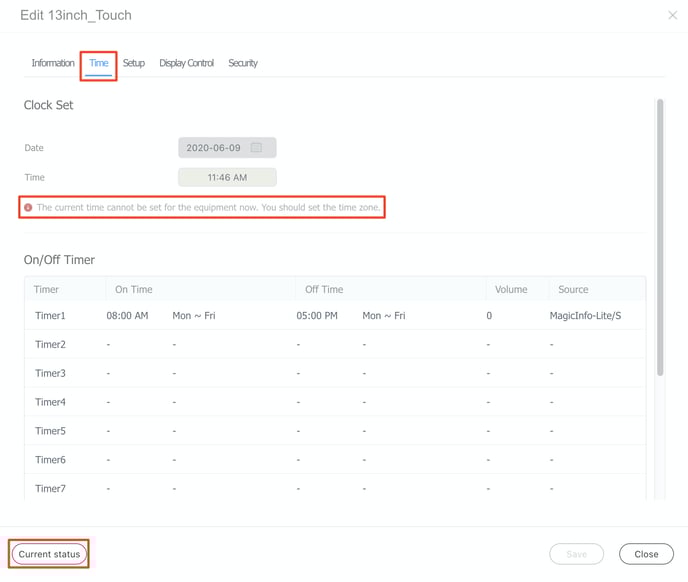
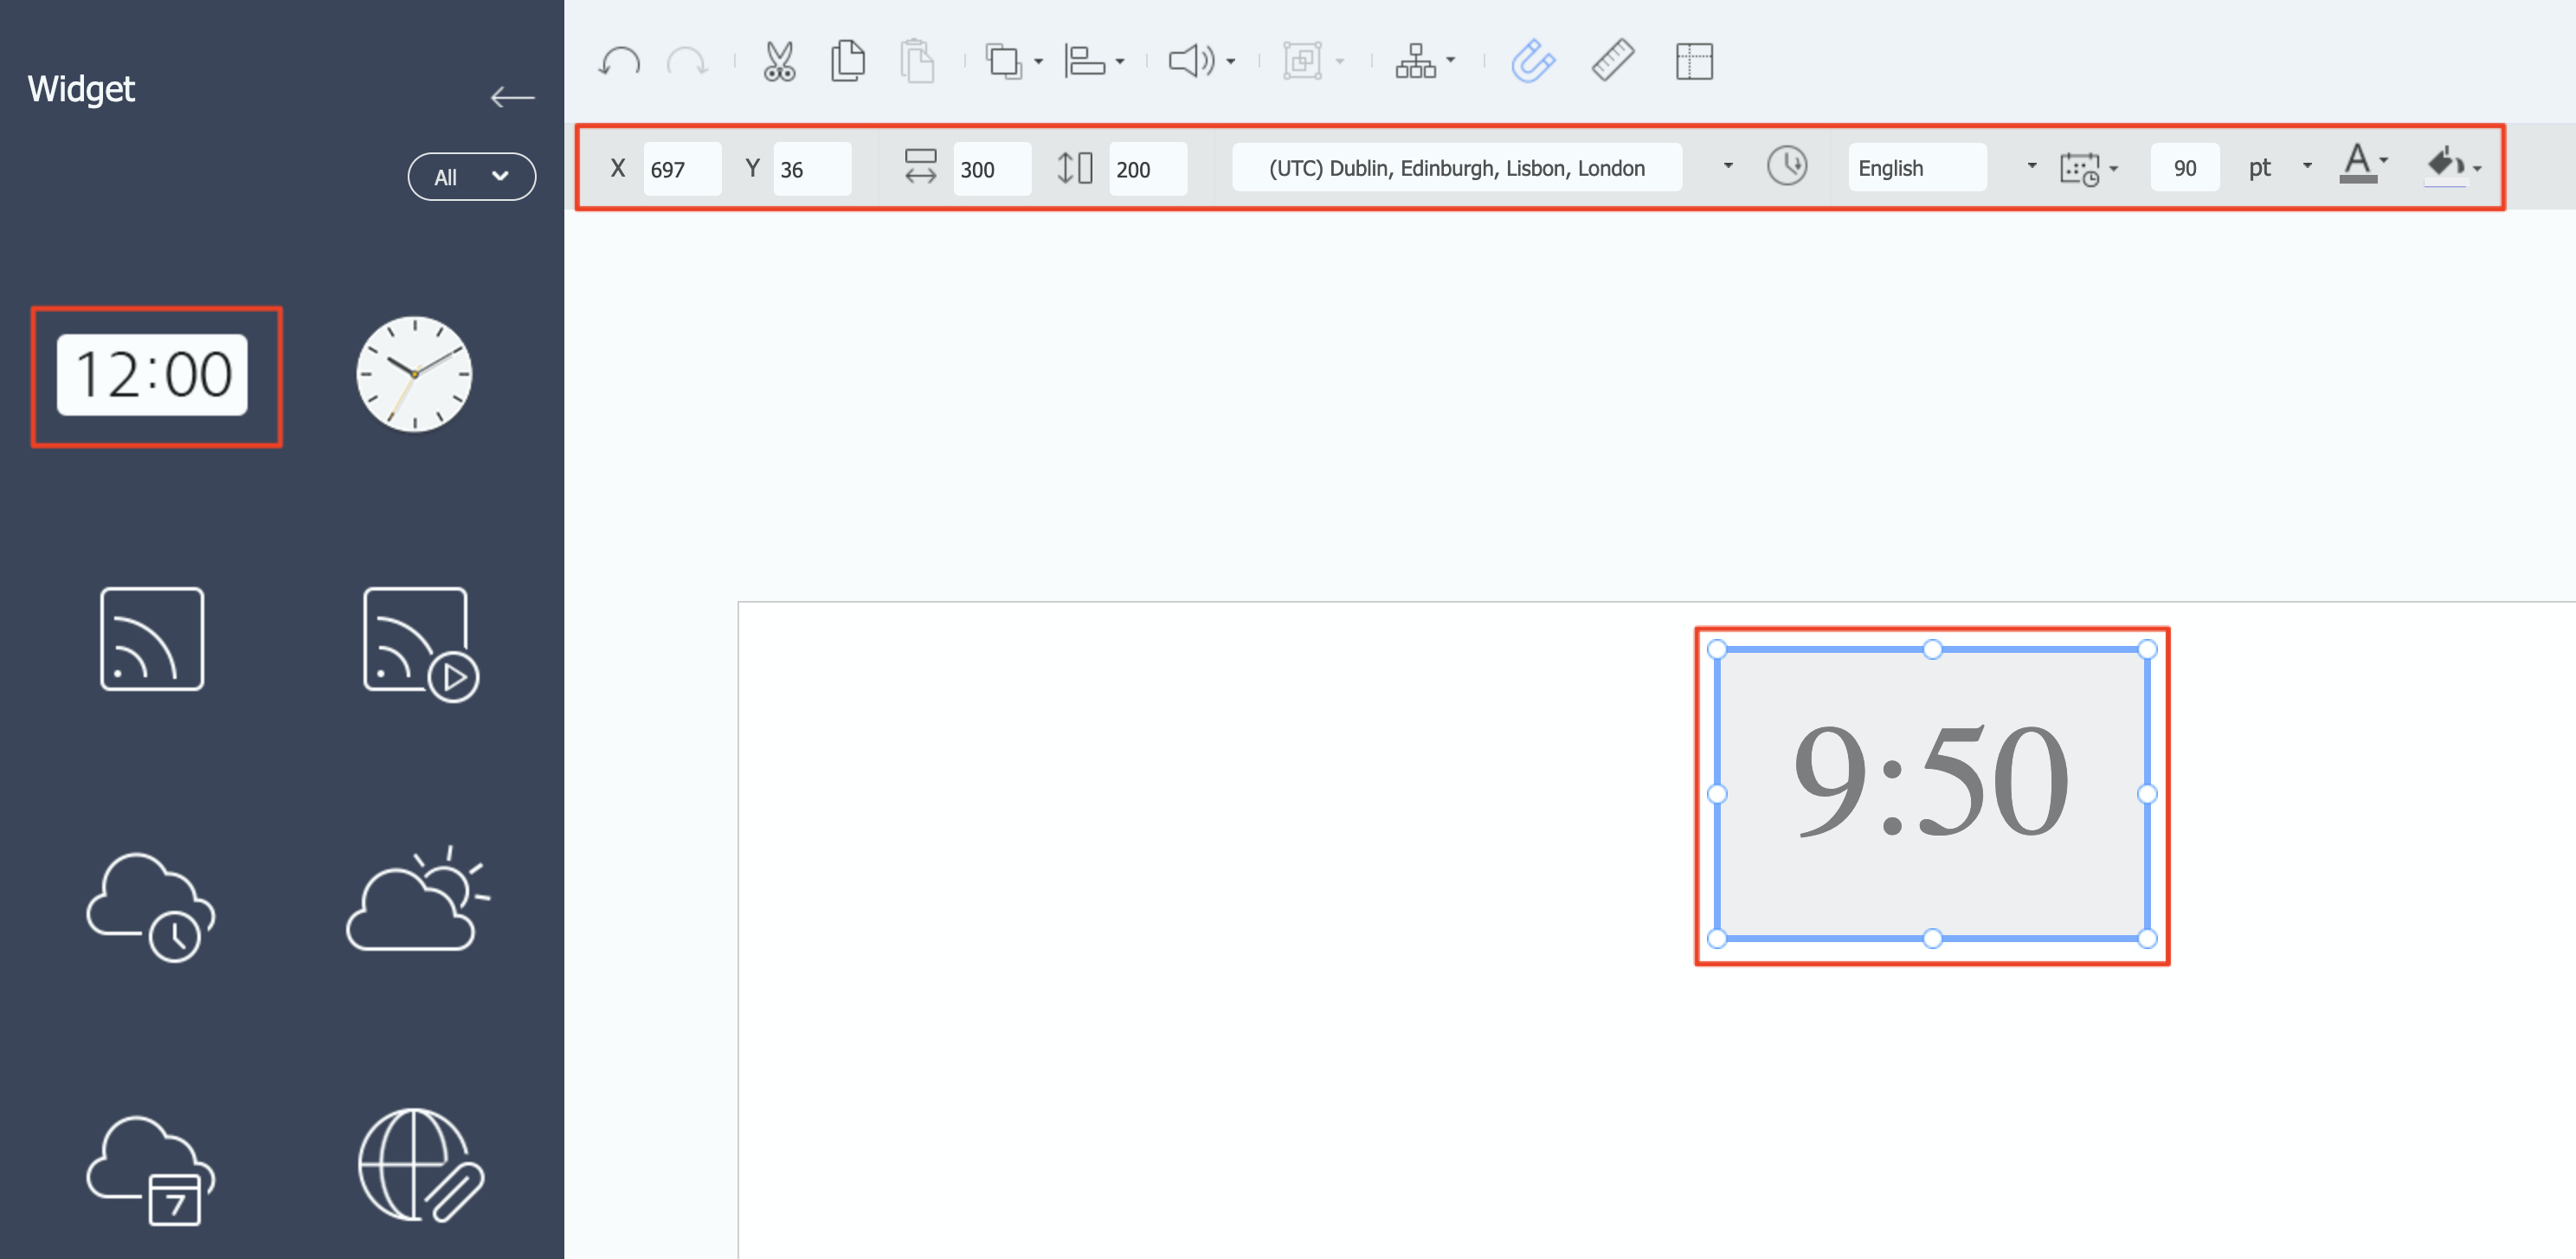
Option 3: Set the time on the clock widget
When using the clock widget in the Web Author, make sure that it also has the correct time settings.
Open the Content tab >> Web Author and select the clock widget, drag this to your page, and fill in the details at the top.