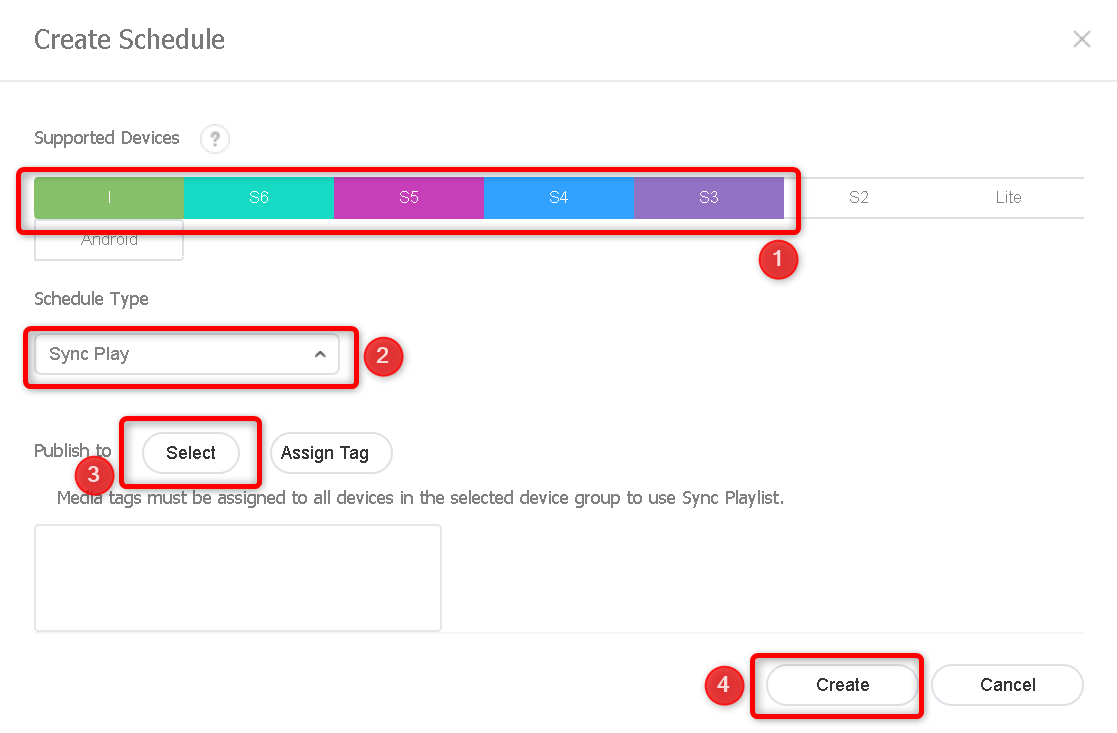
Note: Ensuring each device is connected to one access point with the Snooping protocol and using devices S3 and higher are two requirements that need to be met for the Sync Play feature to work.
Video Tutorial:
Detailed Instructions: Using Sync Play in MagicINFO
Step 1: Assign tags to screens.
Ensuring your screens have a dedicated tag as it will direct the right content item to the display.
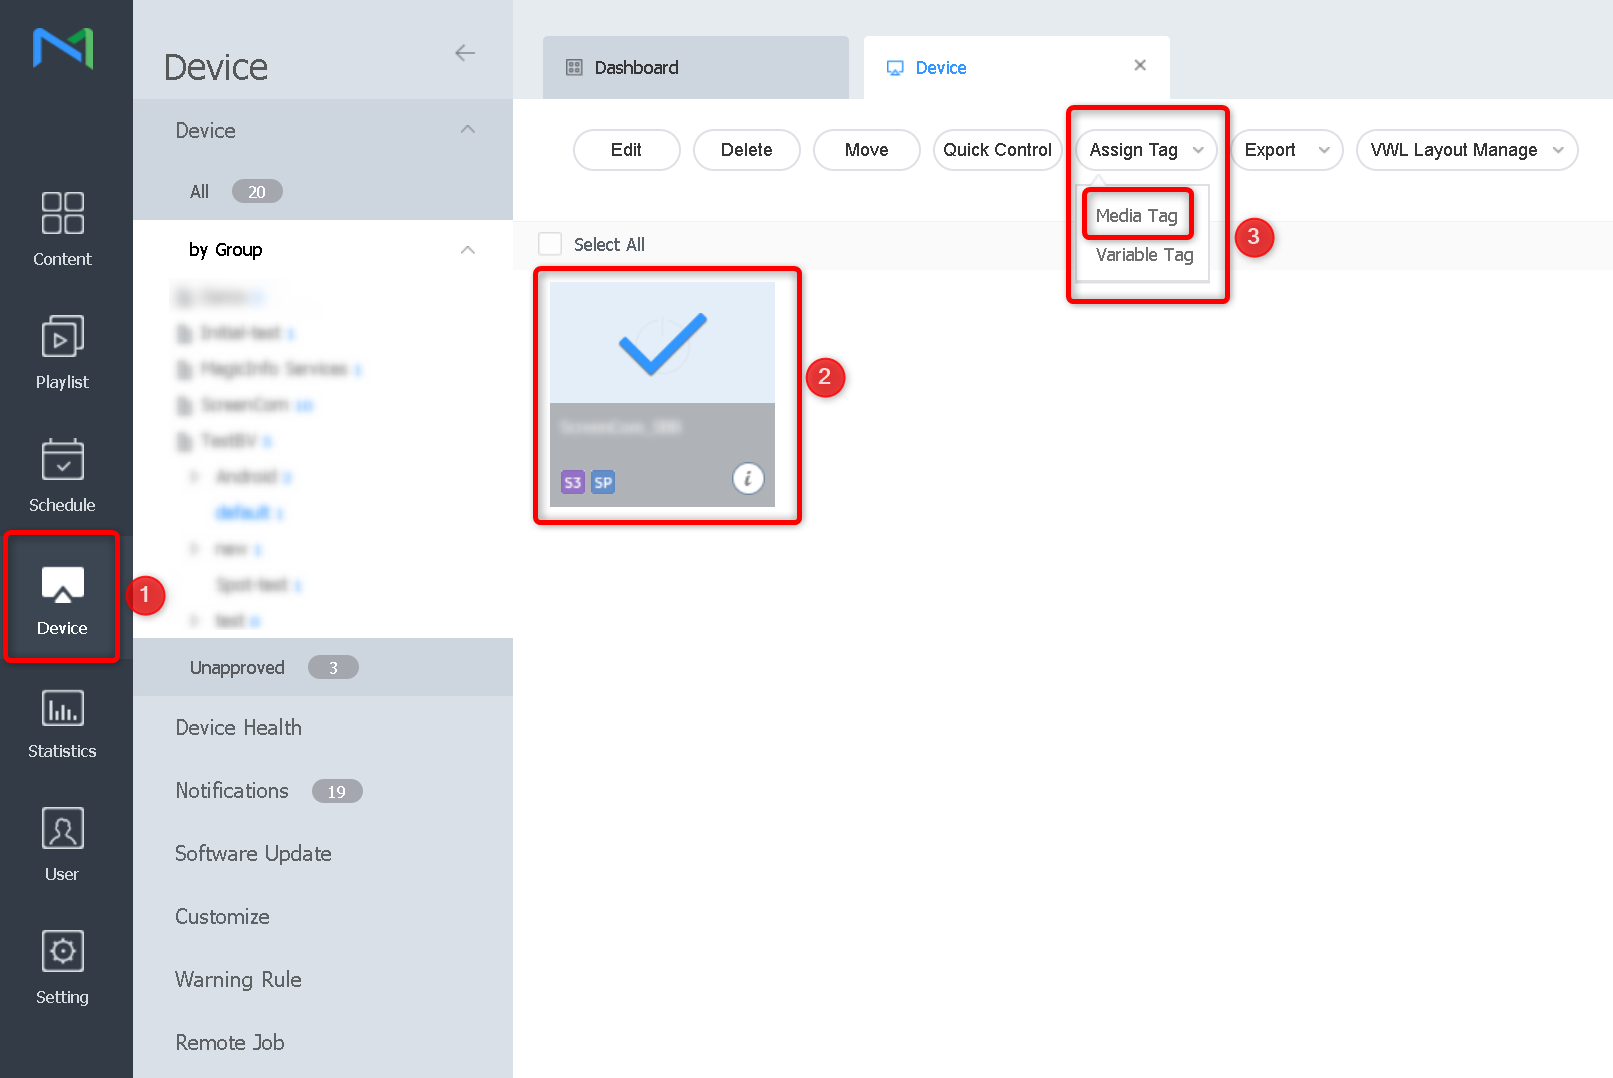
- Navigate to your device section.
- Select your device.
- Click 'Assign Tag’ and then Media tag' from the dropdown menu.
Step 2: Select an existing tag or create a new one to ensure accurate content dispatch.
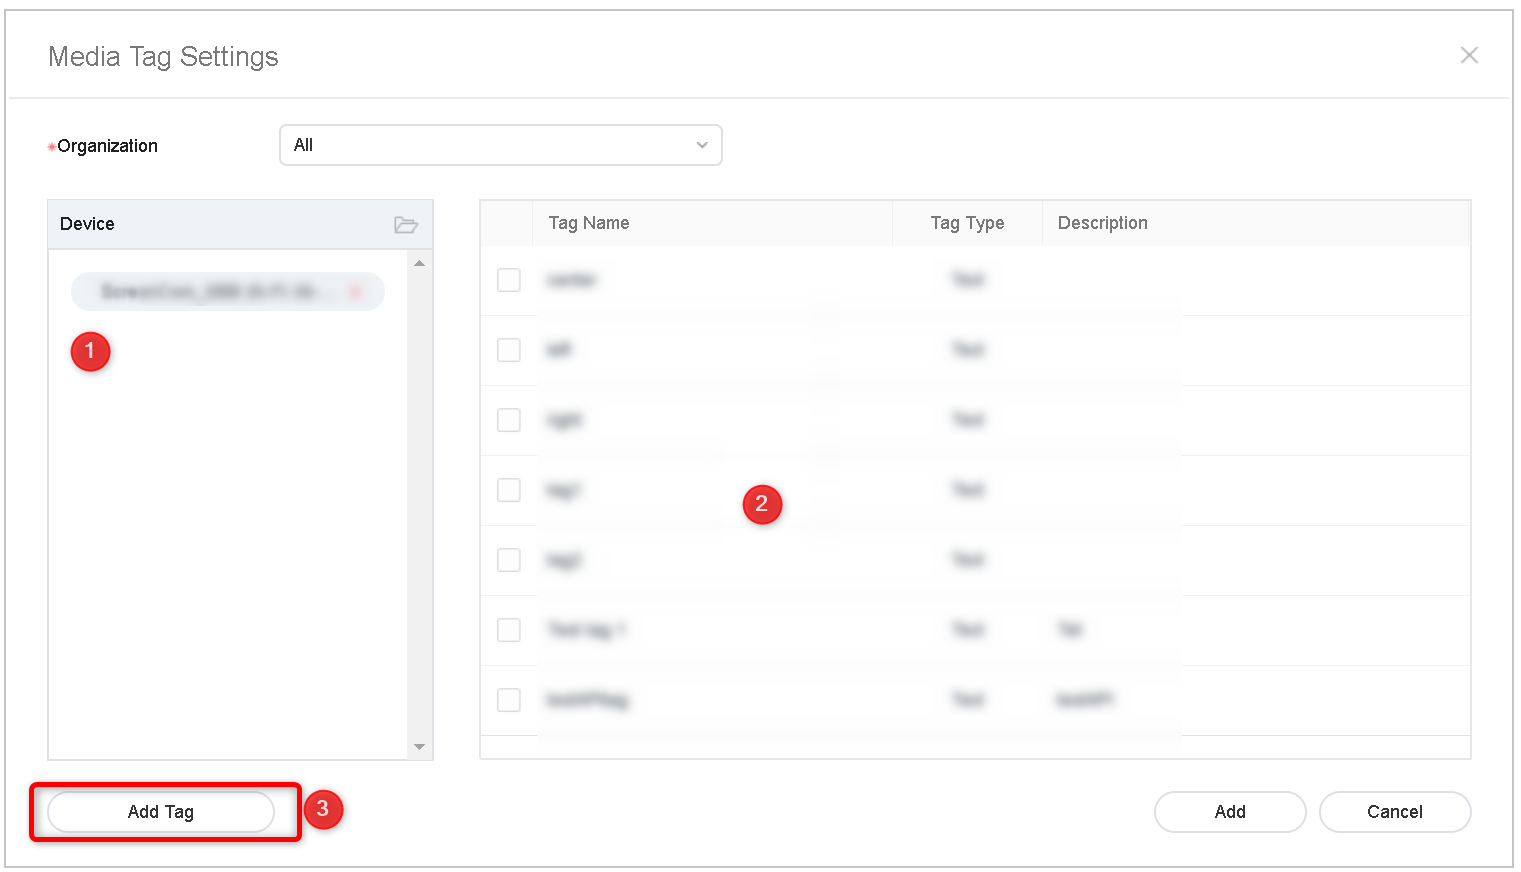
- Here you see the device you have selected.
- View and select existing tags in this field.
- To create a new tag, click on 'Add Tag.
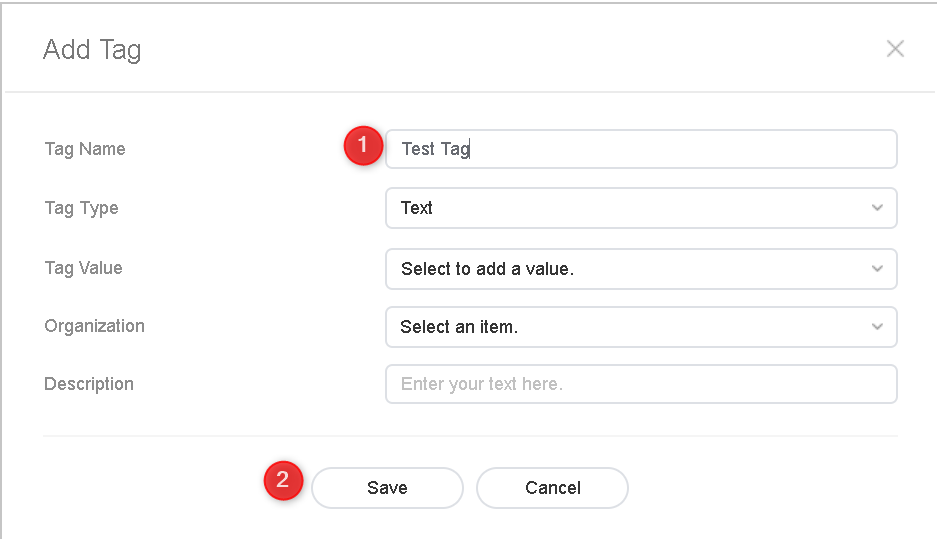
Step 3: For Text type tags, give your tags a clear and short name and save them.
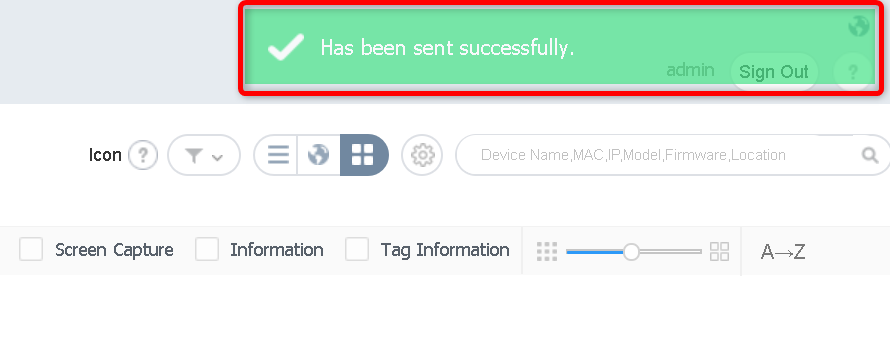
A confirmation of the tag assignment to your device should appear in the upper right corner.
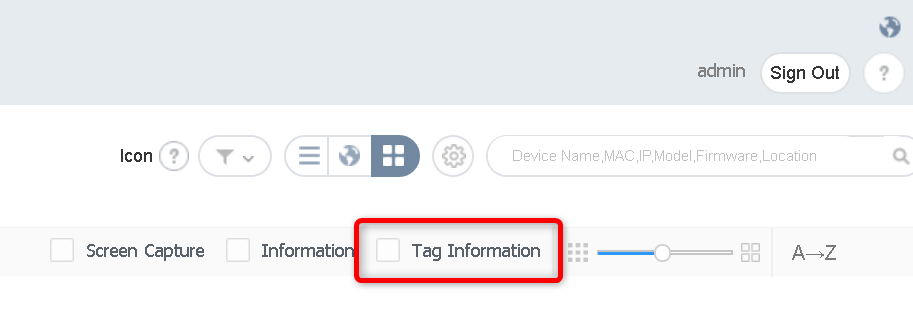
You can check all the tags on your screens using 'Tag information' option shown below:
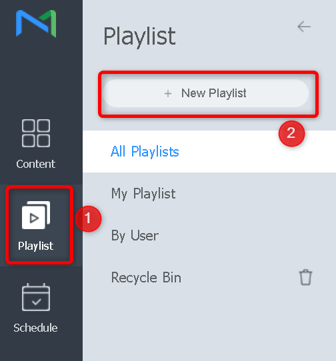
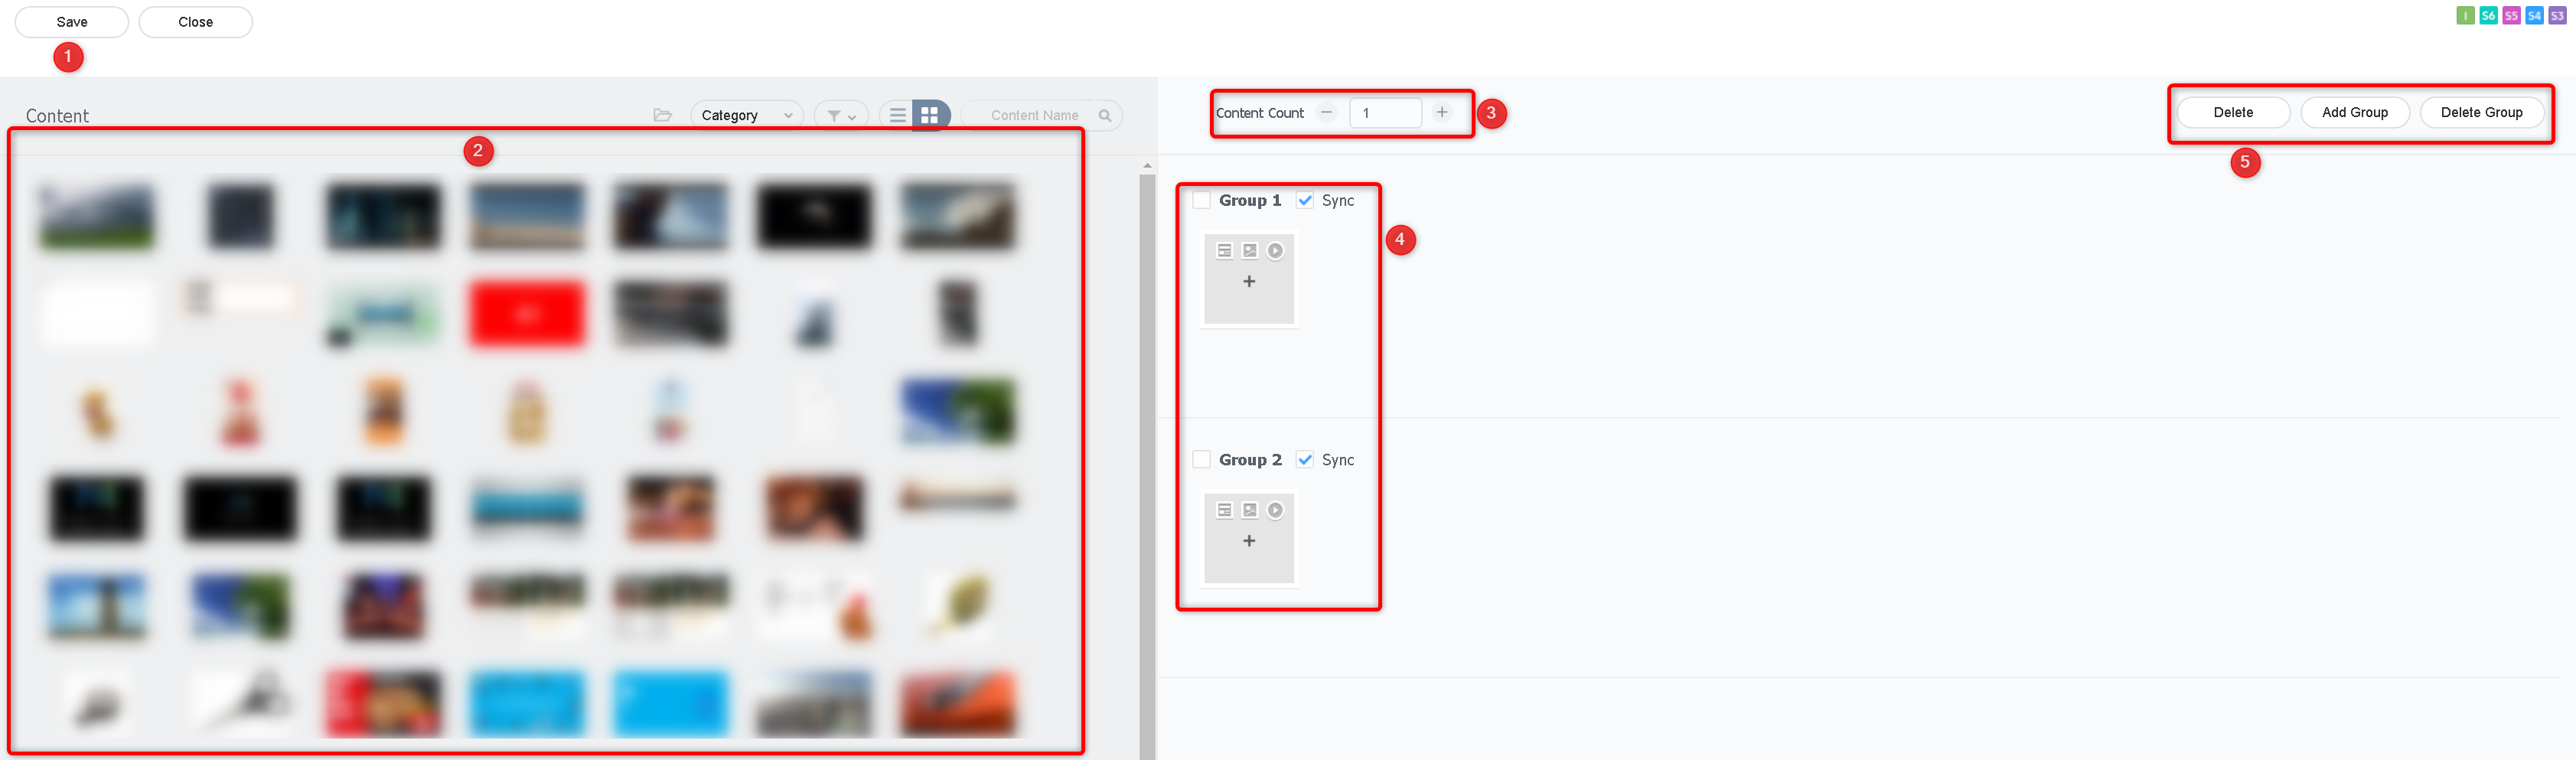
Step 4: Create a sync play playlist in MagicINFO
- Click 'Playlist'.
- Select 'New Playlist'.
- Choose your player and ensure it is S3 or higher to enable Sync Play functionality.
- Select ‘Sync Play’.
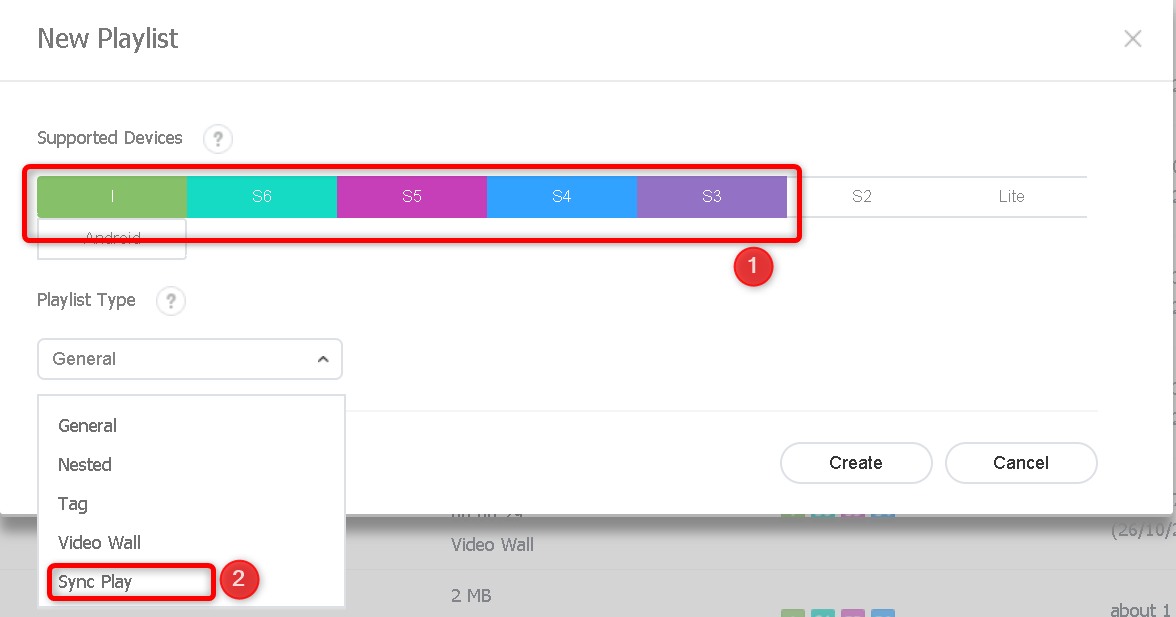
- Click 'Save' to keep your playlist once finalized.
- Browse through the available content on your server.
- Determine the number of content items to include in your playlist.
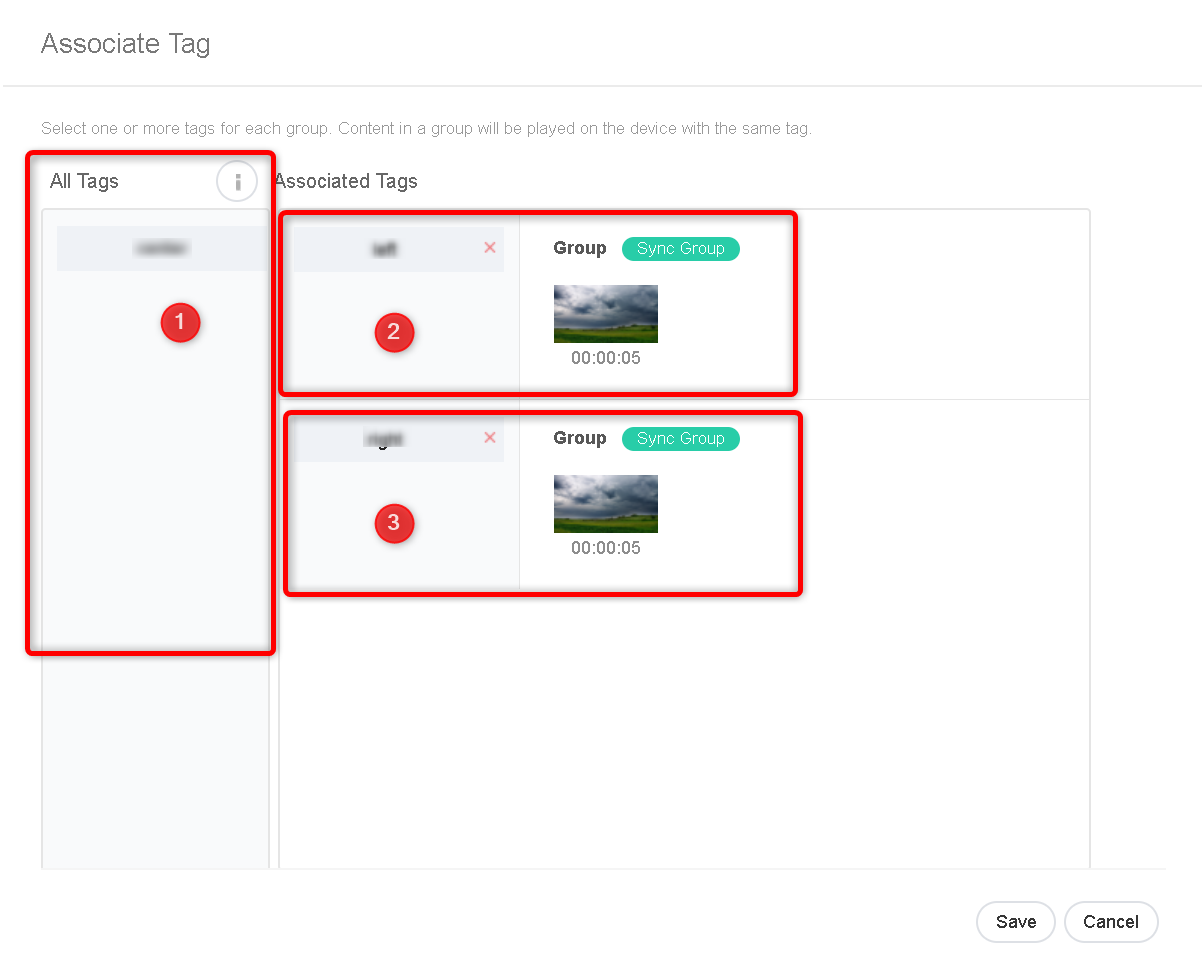
- Here you can see the usable groups, screens, and tags.
- Add and/ or remove a group, screen, or tag as per your needs.
Note: A group stands for a tag, this means you will assign a tag to one of these groups.
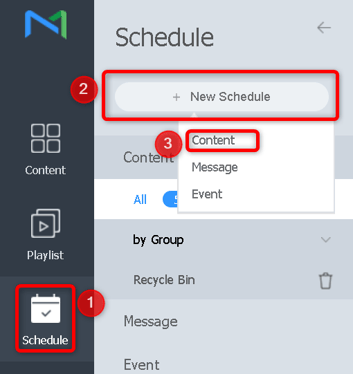
Step 5: Schedule your sync play in MagicINFO
- Navigate to 'Schedule'.
- Click on 'New Schedule'.
- Click 'Content' from the dropdown menu.
- Select your player; Keep in mind that the synced playlist feature is only available from S3 and higher.
- Select ‘Sync Play option’.
- Select the screens you want to use.
- Click on ‘Create’ to initiate the process.
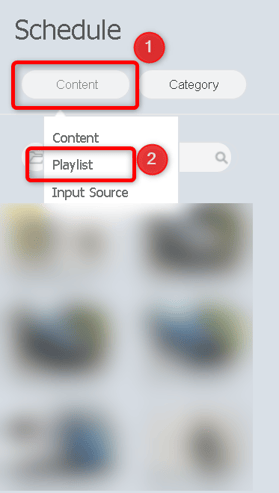
- Navigate to the 'Content' tab.
- Now select 'Playlist', and the Sync playlist will show automatically.
When dragging and dropping the selected playlist on the agenda overview, you will be prompted to configure your Sync options in a new pop-up window.
- View the tags, previously created, in the screen section.
- Drag and drop the tag you need in the designated group.