Ensure that your content displays seamlessly on your screen with these step-by-step instructions:
Step 1: Log into your MagicINFO server.
Begin by accessing your MagicINFO server and logging in using your credentials.
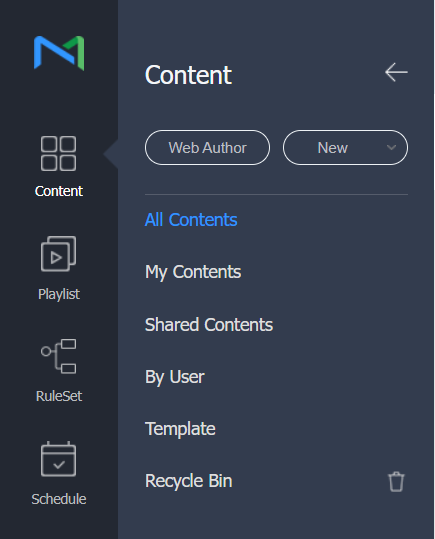
Step 2: Access the content page.
On the left side of your screen, locate and click the Content tab to access your content management page.
Step 3: Upload your image or video.
To add your image or video to the MagicINFO server, press the New button, and select Upload Content.
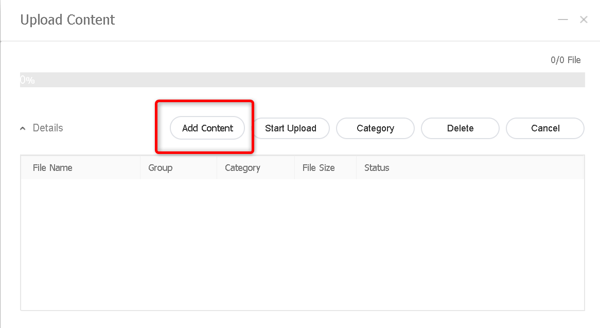
Step 4: Locate and add your files.
A pop-up screen will appear. Use it to locate the image or video file on your computer; click Add Content to proceed.
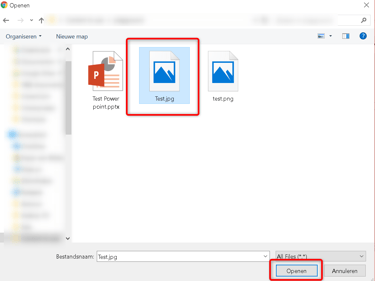
Locate the file on your computer, select it and click Open.
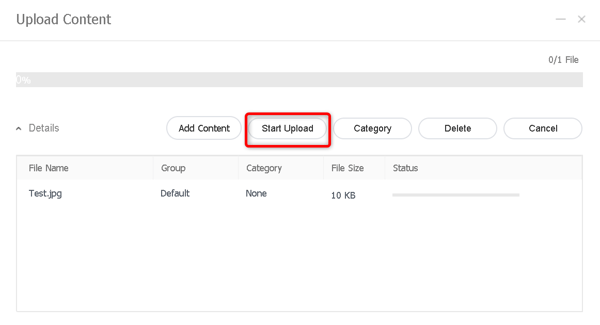
Step 5: Initiate the upload process
Click Start Upload to begin uploading the selected files to the MagicINFO server.
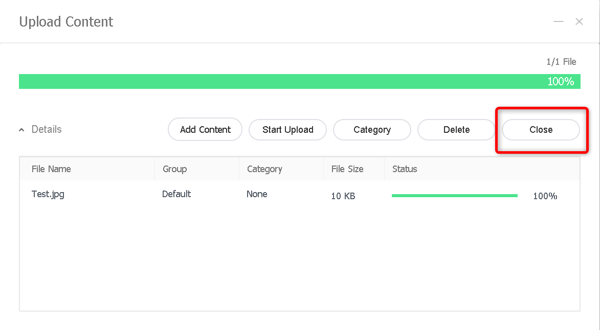
Step 6: Close the upload window.
Once the upload is complete, click Close.
Step 7: Review your uploaded files.
You can now view the files that are ready for use on the MagicINFO server.

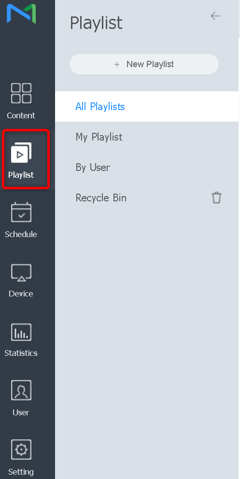
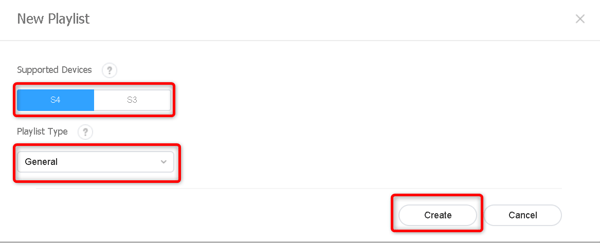
Step 8: Create a playlist
To organize your content, you will need to create a playlist. Select Playlist from the menu on the left side.
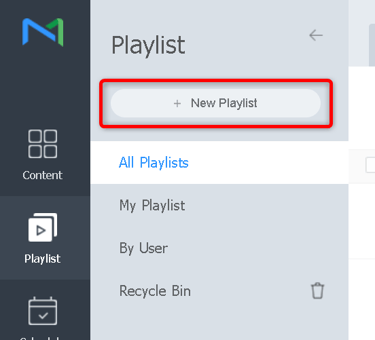
Click New Playlist.
Choose your player type and select the playlist type as General, then click Create.
In the left field, you will see the content items you uploaded to the MagicINFO server. In the right field, are located the items you want to include in your playlist.

After adding the desired items, click 'Save.' A new pop-up will appear; provide a name for your playlist, leave the rest of the setting as default and click 'Save' to confirm.

Now you will be able to see the saved Playlist.

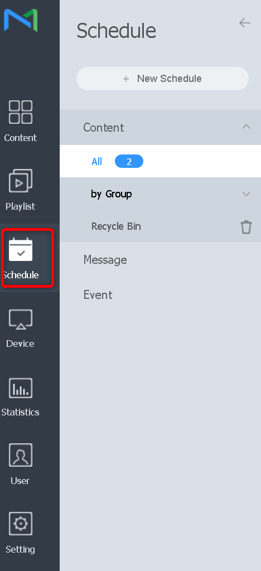
Step 9: Schedule your content
Go to the Schedule tab to create a schedule for displaying your Playlist/content on your screen.
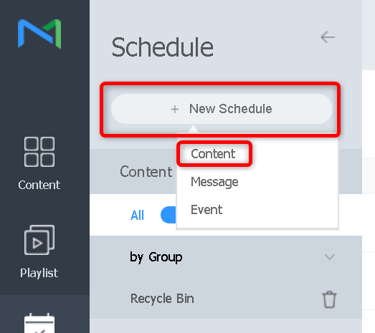
Click New Schedule and then Content.
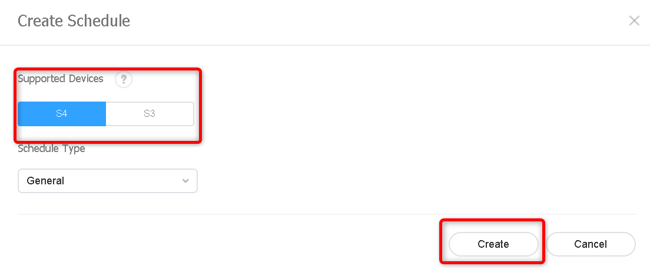
Select your player type and leave the Schedule Type option as General as shown below.
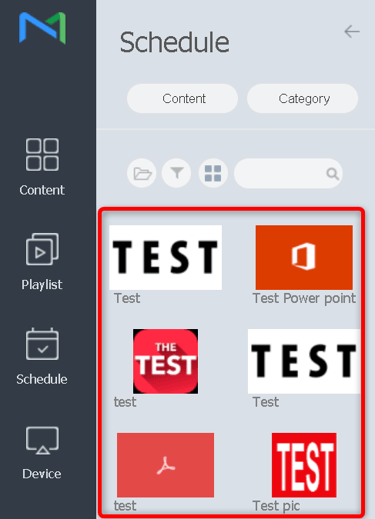
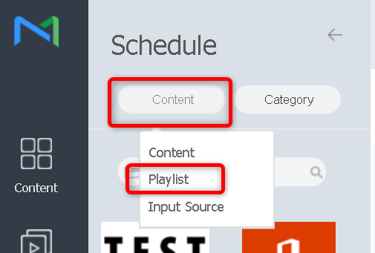
On the left side, you will see all the content items you uploaded to the MagicINFO server.
Click on Content, select Playlist, and you will be able to see the Playlist you created earlier.
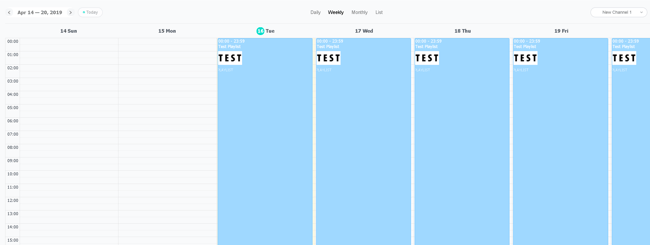
In the right field, you will see an agenda overview. Here, you can drag and drop the item/Playlist you want to display on your digital signage.
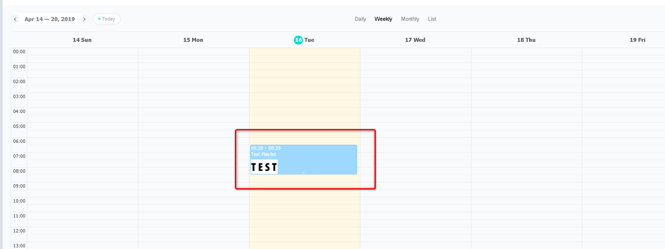
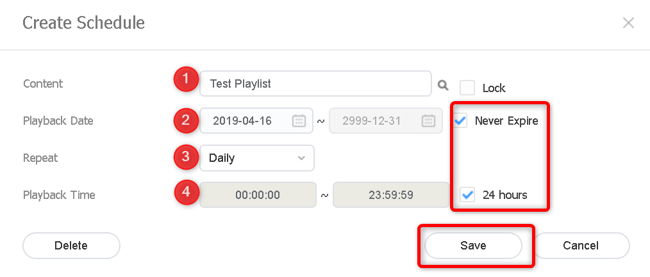
Once you have added an item to the agenda, click on it to set the playtime and date, as shown below. Configure the following options:
- Content item name
- Playdate (for this example, we use 'never expire')
- Repeat
- Playback time (for this example: 24 hours)
- Click 'Save.'
We recommend using 'never expire' and '24 Hours' to ensure continuous content playback.
You have currently set up the item/Playlist to display every day for 24 hours.
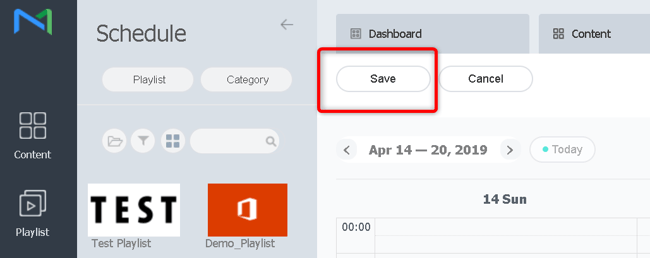
Step 10: Save your schedule.
Click Save to save the schedule.
Step 11: Additional options.
A new pop-up screen will appear, here you can:
- Provide a clear name for your schedule.
- Choose the default folder to save this schedule.
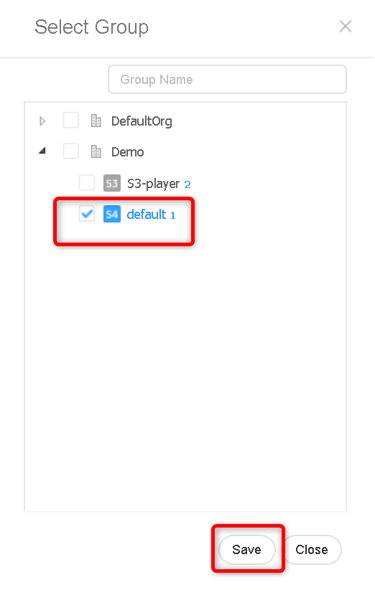
3. Select the devices where you want to display this schedule using the 'Publish to' option.
4. Click Save and Publish.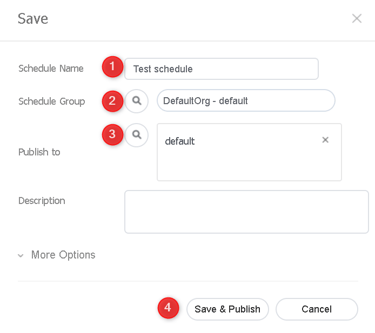
Step 12: Wait for the download.
Your schedule with the content/Playlist, will now be sent to your device. The device will download this content from the server, which typically takes around 10 minutes, depending on the schedule's size and your display's internet connection.
Congratulations! You have successfully published your content on your MagicINFO device, ensuring it's displayed as intended.
