Video Tutorial:
This guide will walk you through the systematic process of setting up a schedule using frames.
Note: You cannot schedule a playlist with the frames option, only Content items.
Detailed Walkthrough: How to Set Up a Schedule Using Frames in MagicINFO
Step 1: Log into the MagicINFO server

Step 2: Create a new schedule
Navigate through:
(1) Schedule >> (2) New Schedule >> (3) Content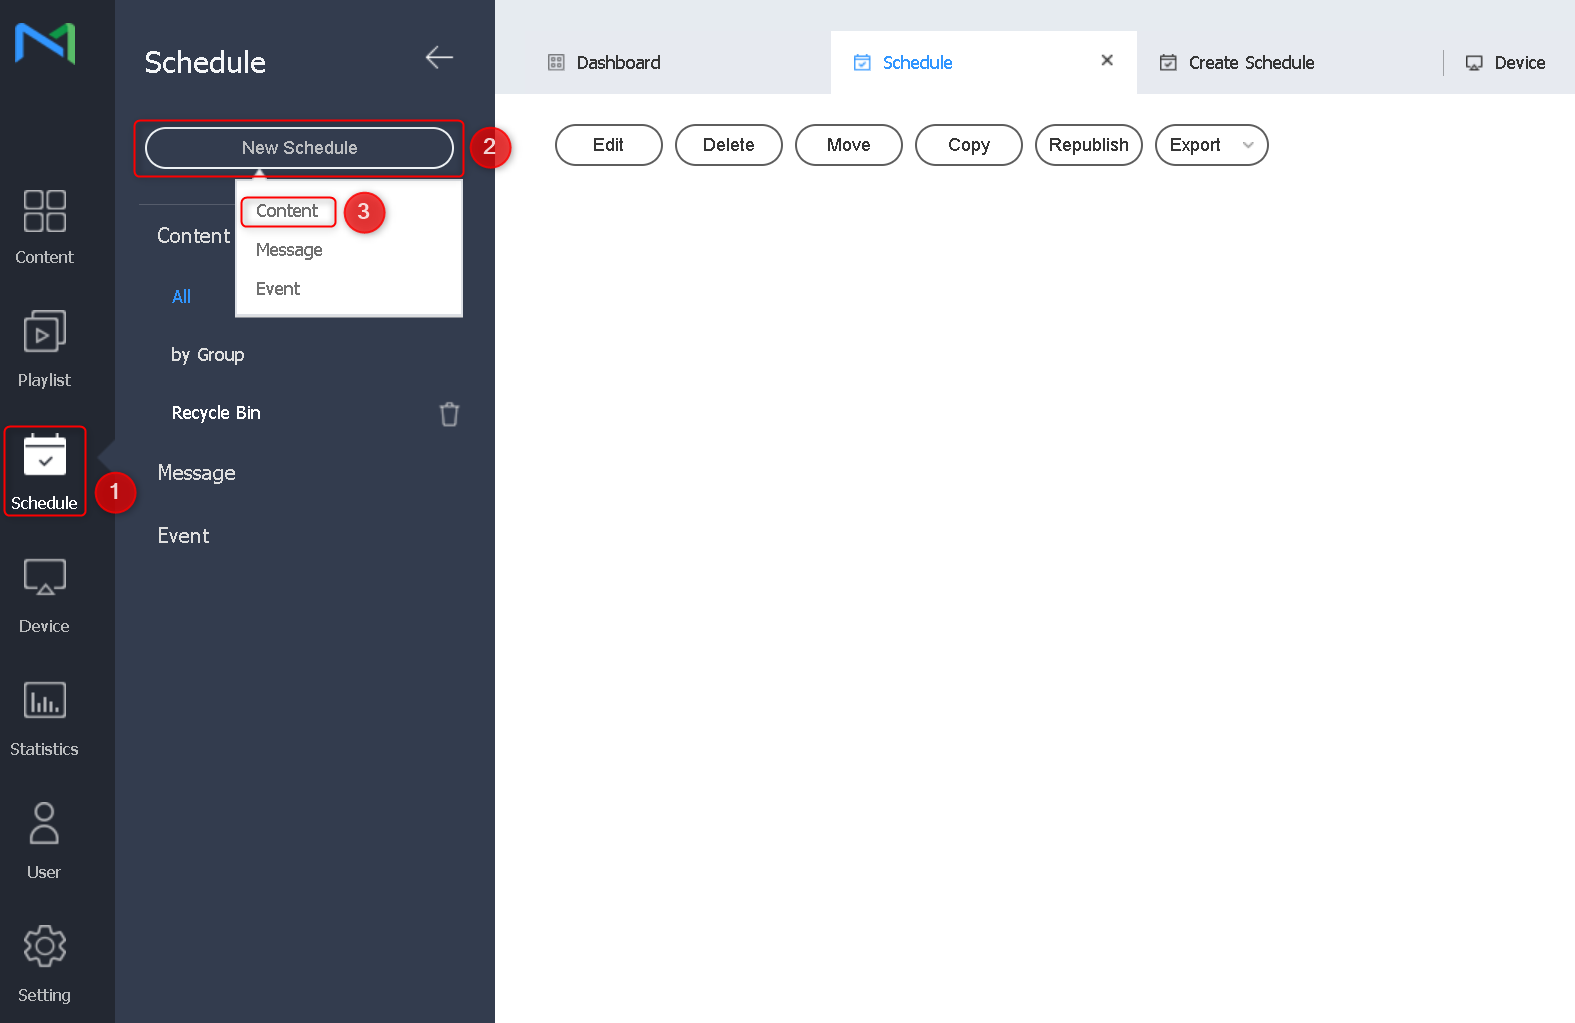
Step 3: Configure schedule settings
In the new pop-up window, select the following:
(1) Supported Device >> (2) Schedule Type (keep general) >> (3) Create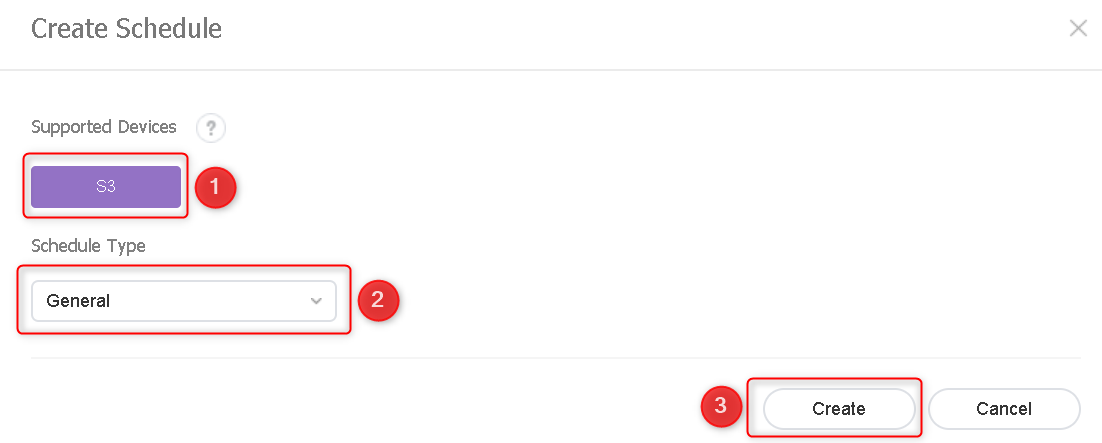
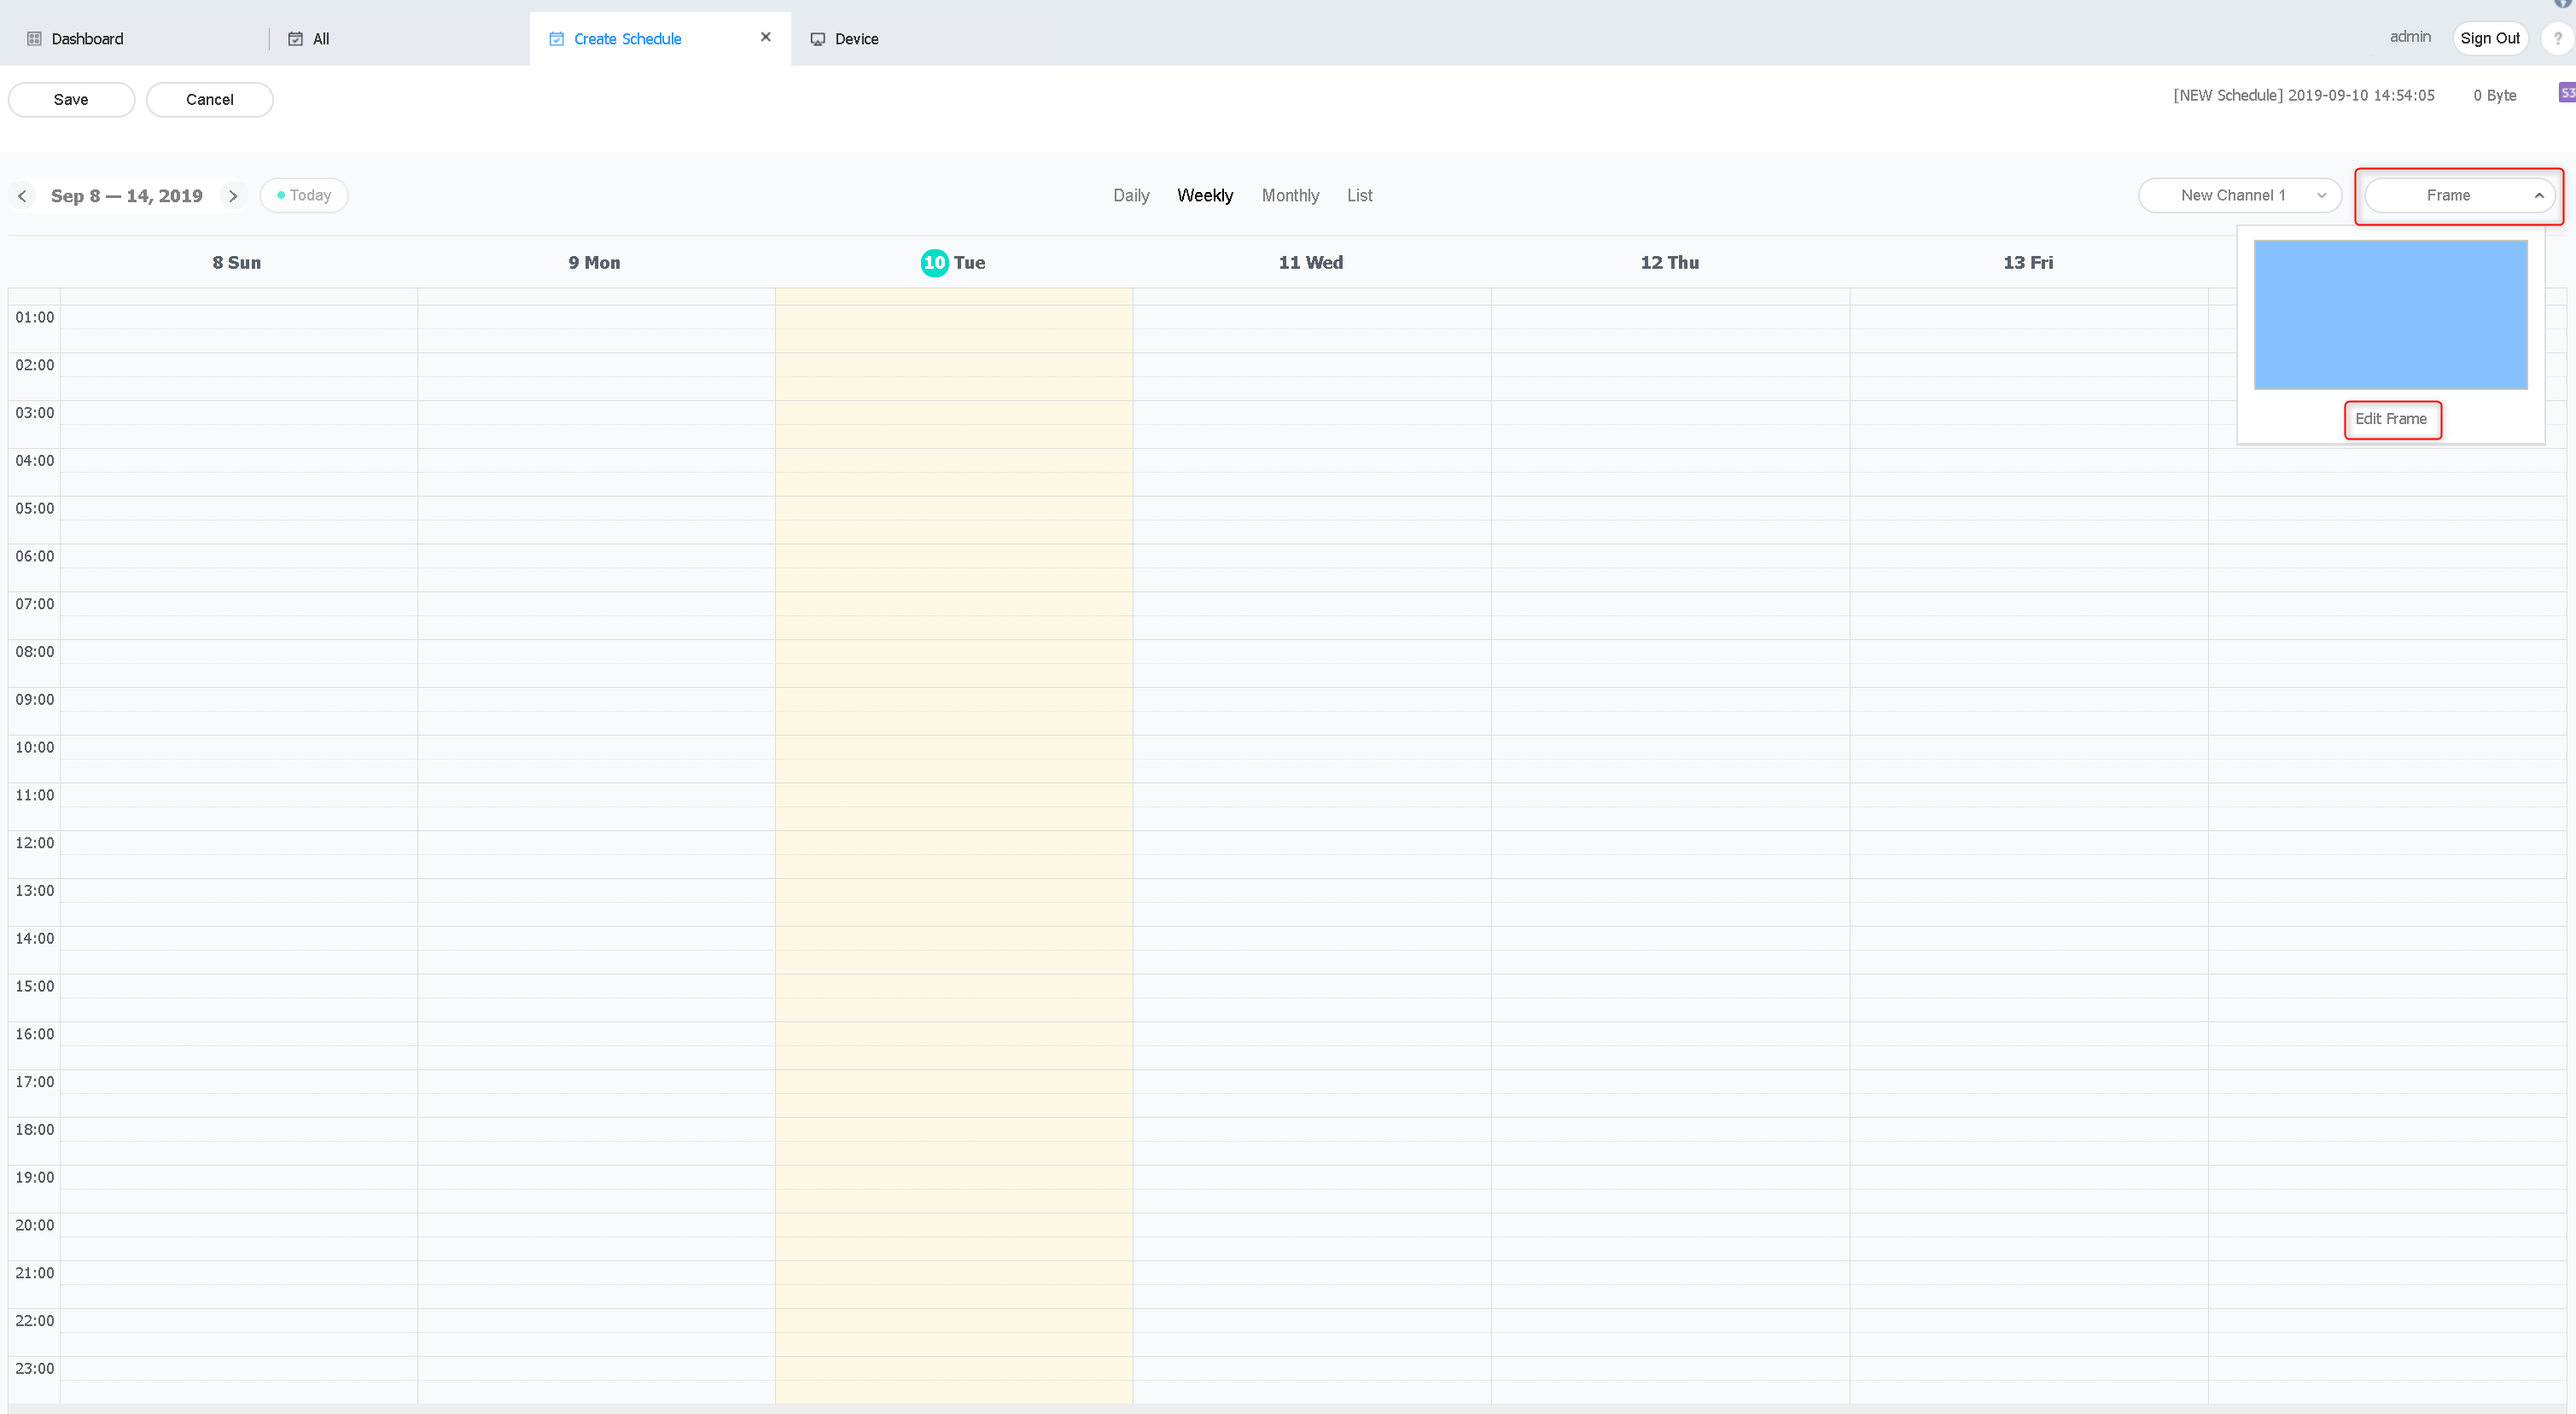
Step 4: Once in the schedule, locate and click 'Edit frame' in the upper right corner as shown below:
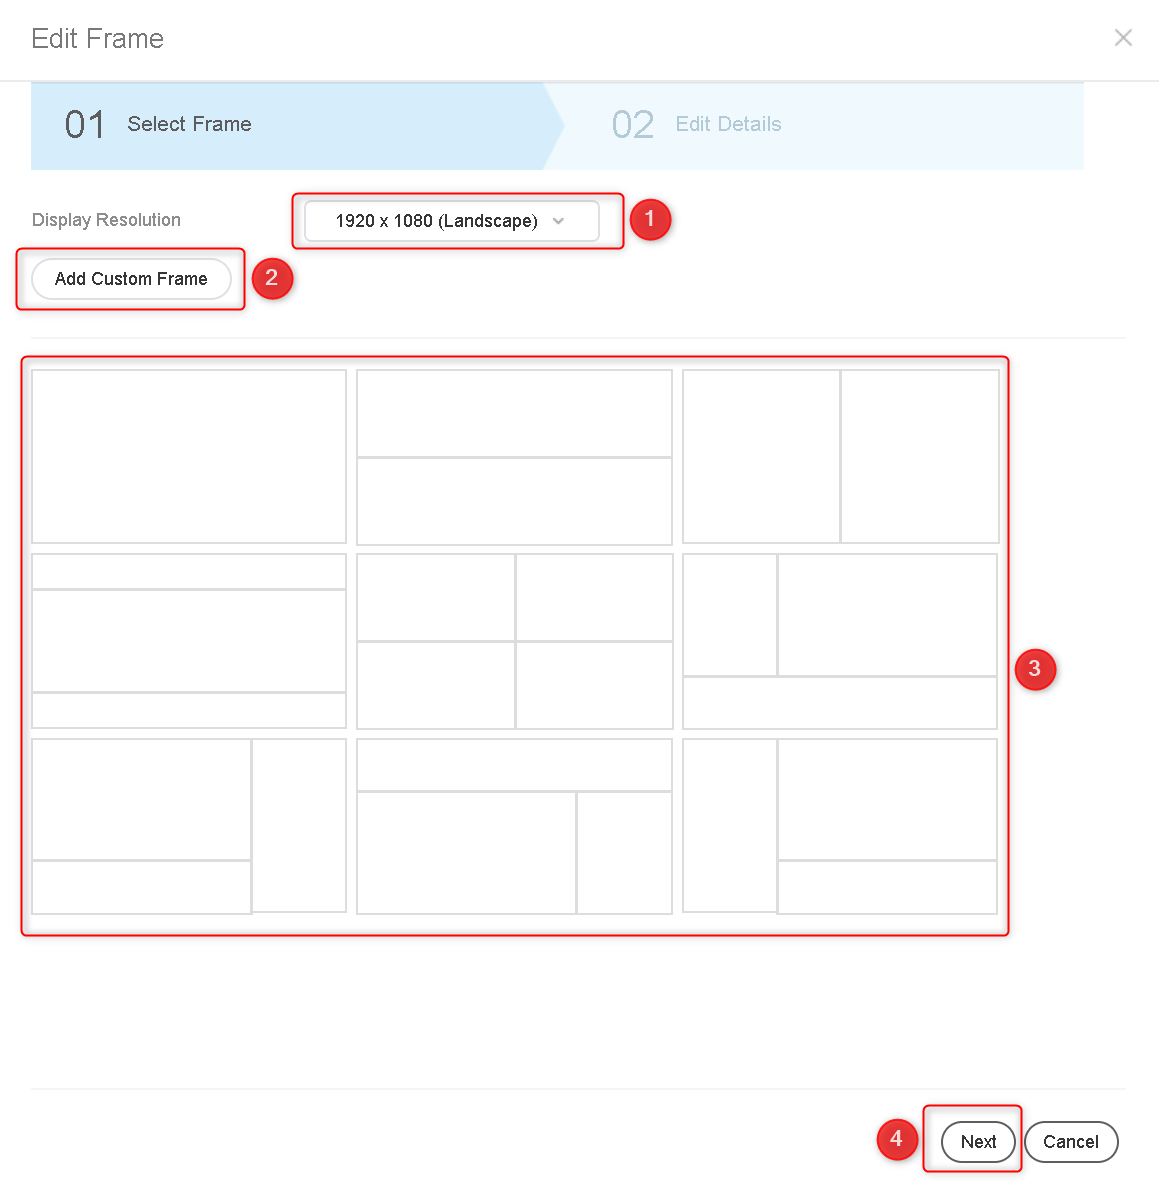
Step 5: Customize your frames in the new pop-up. You will have options to:
- (1) Adjust your device resolution
- (2) Add a custom frame, or
- (3) Choose a pre-installed frame (Recommended)
- (4) Click 'Next'
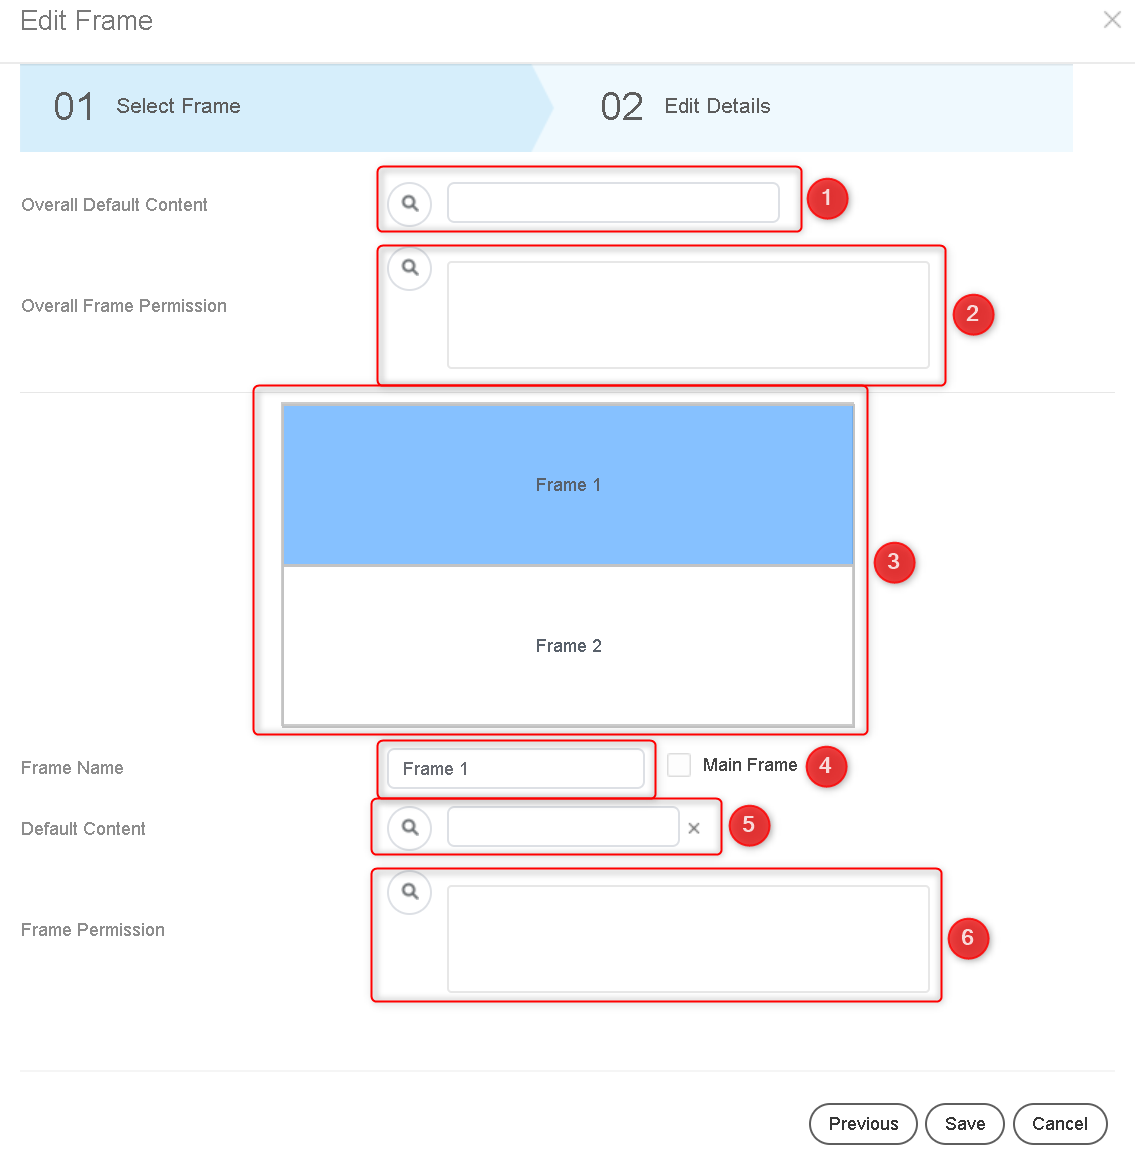
Step 6: Define frame specifications
Here, you can set up content for your frames:- (1) Choose default content for all frames in case there is no distributed content.
- (2) Choose a user group that can use all the frames.
- (3) Choose an individual frame.
- (4) View and modify the name of the frame selected in (3). To use the frame as the mainframe, select 'Main Frame'.
- (5) Select content to play (by default) in the frame chosen in (3).
- (6) Assign a user group that can use the frame selected in (3). Upon completion, click 'Save'.